Pumpkin Cupcakes with Cheesecake Filling

Or Cheesecake-Filled Pumpkin Cupcakes. Either way, it’s a mouth-ful.

I don’t know what it is about fall that makes me love pumpkin so much. Or is it the other way around? Do I love pumpkin so much that it makes the cold and wet autumn season easier to bear? Recently I have been wondering if I would love pumpkin goodies as much as I do if I could have them all year round. The jury is still out on that one.

Either way, it is fall now and regardless if the chicken or the egg came first, I love me my pumpkin treats. Pumpkin pies… pumpkin cheesecake… lattes… scones…

Each year as we near Thanksgiving now I look forward to making my Cheesecake-filled Pumpkin Cupcakes for friends and family. I love the compliments I get on these easy-to-make treats, and they really are delicious. I’m not really a cupcake fan but these are just the right amount of pumpkin, of spice, of fluffiness.

I’ve adjusted a recipe I found a few years ago in the Rachael Ray Magazine to my own liking. If you don’t already have a great pumpkin cupcake recipe, try her’s. Since I didn’t have any Pumpkin Pie Spice (I don’t even know what that is, to be honest), I just substituted in spices that I would normally use for my pie (cinnamon, nutmeg, etc).

It’s sort of a multi-step mixing process, especially with the layering of the pumpkin and the cheesecake but it is so worth it.

First layer: Pumpkin batter

I recommend using the smallest cookie scoop you can find in your kitchen. It’s going to make the layering just a bit more manageable.

Cheesecake filling in the middle!

Both batters are a bit on the thick side so you’re going to want to tap the pan on the table a few times. Be sure to tap on a level surface so the cupcakes don’t slide. If you have trouble with this, try greasing the pan before the liners go in so they don’t budge later. Times like these are when I wish I had a vibrating table. Layer the pumpkin batter on top again, pop in the oven at 350 degrees for 25 minutes, or until a toothpick comes out clean.

Let them completely cool before icing. I’ve never tried the buttercream recipe that is included with the cupcakes’ so I don’t have any comments on that and don’t know if the two go well. I always prefer cream cheese frostings to buttercreams so I paired mine with Orange Cream Cheese frosting. I found the slight orange flavor was a better pairing than just regular vanilla – it brought out the spices in the pumpkin just a bit more, offering a great complimenting pair.

An ordinary Pumpkin Cupcake made extraordinary

If nothing else, baking these yummy treats will for sure brighten up a cloudy fall day. Hope everyone has a very happy Thanksgiving holiday!

Tagged , , ,

Cake Bites: what they are and how to make them

Friends of mine are probably already tired of me yapping away about my newly created Cake Bites. It’s only been one week since I officially started making them, but I’ll be honest and say I’ve been over-the-top promoting them. I just can’t help it! It’s the first product that I’ve created that is really taking off. And why wouldn’t they? Bite-size cakes, who doesn’t want that?

I was actually really surprised to find that no one else is making these yet. Instead, stores and websites are currently obsessed with cake pops. As cute as they are, I find that the popsicle stick useless and a waste of resources. If you’re going to have a bite-size dessert, shouldn’t it really just be bite-sized? As in, pop it in your mouth and that’s it?

I compare my Cake Bites to donut holes. I’m not a fan of donuts but I do love donut holes. Doesn’t make too much sense, right? I think it’s the ease of eating them, how you can (in most cases) control how many (really I mean little) you are eating, and how much more glaze you get compared to a donut bite :)

I really wanted to make them look like truffles too, like the chocolate. As you may or may not know, I used to be pretty obsessed with Godiva chocolates. I also fell in love with making chocolate candies after attending a 2-day chocolate making class in Torrance. I joined these two ideas together – donuts and truffles – to create Cake Bites.

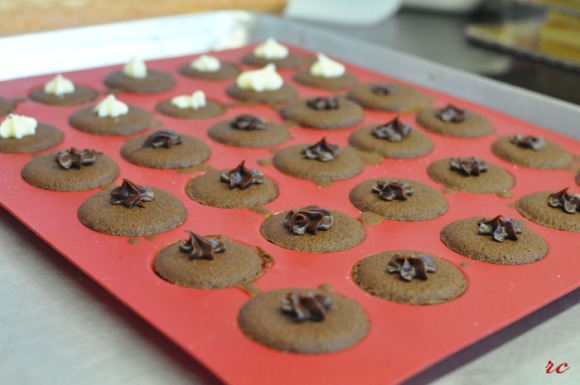
I originally wanted to make them perfectly sphered, but I had bought these macaron molds from Amazon that ended up being way too small for macarons. I baked cake in the macaron molds, and it turned out great. Not completely circular, but good enough.

So fill the molds with the batter of your choosing and bake. Be careful not to overbake since they are so small. Once I overbaked mine and even though they were super easy to pop out of the molds that way, it did not taste good. Underbaking will also make it extremely difficult to pop the bites out. Some playing around with the oven might be necessary to find the exact minutes these babies need to be in there.

Let them cool down before touching them. If baked correctly, most of them should pop out if you give it a little shake upside down. Otherwise they should be easily peeled out. If they’re cracking while doing that, it’s probably just a bit underbaked. If that’s the case just invert the silicone mold (yay for silicone molds!) and de-pan that way. It’s still super easy, just a bit more time consuming.

Then, on half the shells, pipe just the amount of icing needed to adhere the two sides together. Find it’s other half (one of my favorite steps of macaron making!) and sandwich together.

Throw them in the freezer for a little bit so they are easier to handle. Meanwhile prepare the shavings and icings. Shaving chocolate is very, very easy. Literally take a vegetable peeler and start peeling away at a block of chocolate. If you can warm up the block (maybe in a warm oven for a few minutes), you’ll get much nicer shavings and ribbons.

You want to get your icing as soft as you can. In my case I just popped it in the microwave for about 20 seconds. After the now sandwiches are just a bit hard, cover them in icing. Use the method that is easiest for you. Throw them in then fish them out, or cover them with your hands, or drizzle the icing over them (though this method produces a lot of waste).

It’s important to completely cover the sides of the sandwich so the end product can resemble a sphere. If the sides aren’t completely covered you’ll be able to see the two layers, in which cake your Cake Bites will look a lot more like Whoppie Pies. Toss the covered sandwiches in your chocolate shavings and cover completely… and you’re done! After working with them the Cake Bites will be very soft and ready to eat. I store them in the fridge until serving because the chocolate will melt in the heat.

Make variations by using different icings and shavings

I bought little baggies from Joann’s and that’s how I’ve been serving them. Cute, no? :)

Easy, cute and delicious. Good luck!

Tagged , , , , ,

Chestnut Mousse Verrines and an untouched site

Work has been all consuming lately that I haven’t touched this blog OR my “new” website since my last post. I didn’t want to continue posting here at this WordPress Blog but since the site is no where near finished, an update here is better than nothing!

I realized that I never posted about the Chocolate and Chestnut Mousse Verrines that I made back in February. Here are some photos but as for the recipe, I basically followed Tartelette’s blog. I believe I made mine with a dark chocolate mousse instead of milk chocolate and used my own ganache recipe, but other than that, same ideas going on. I loooove chestnuts so I very much enjoyed these verrines but unfortunately found that not too many other people share this sentiment. They weren’t bad by any means (I am told, anyway) but not life changing for others.

mixing in whipped cream to melted dark chocolate for the first layer of the verrine

Although.. in the process of making these Verrines I realized that I have been misusing the word “mousse” for quite some time. Apparently what I’ve been making in the kitchen are in fact not mousses but Bavarian Creams. Generally all the “mousse” recipes I’m familiar with require cooking over the stove, which would technically make it a Bavarian cream. Tartelette’s recipe only requires the mixing of chocolate (or whatever ingredient) with whipped cream, which is what a mousse actually is.

mixing chestnut paste with whipped cream to make mousse! doesn't this look dreamy?

Okay so maybe that wasn’t very interesting to you but I thought it was fascinating! Fascinating and also very confusing. I think I might just continue to call them all mousses, if that doesn’t offend anyone. I hate to be incorrect but doesn’t it seem a little bougie to call it Bavarian Cream all the time?

obviously I was partial to the chestnut mousse

I also love making chocolate decor pieces. The only thing that keeps me from playing around with my chocolate temperer more is that it’s extremely messy, and I am so impatient. Plus melted chocolate is so hard to clean! Only when I’m in a very patient state of mind do I play around with transfer sheets.

decorated with chocolate pieces and shavings

My next post will be more fun, I promise.

Tagged , , , ,

PB&J Macarons v2

I’m trying to move my blog so excuse my lack of posts! Will let you know when the website is finally up and running. Probably won’t be for a few weeks though because I’ve been consumed with making new goodies! This past Wednesday I made three kinds of macarons, baked Ciabatta bread and made Chocolate and Chestnut Mousse Verrines all in one day. It was exhausting but also ridiculously fun.

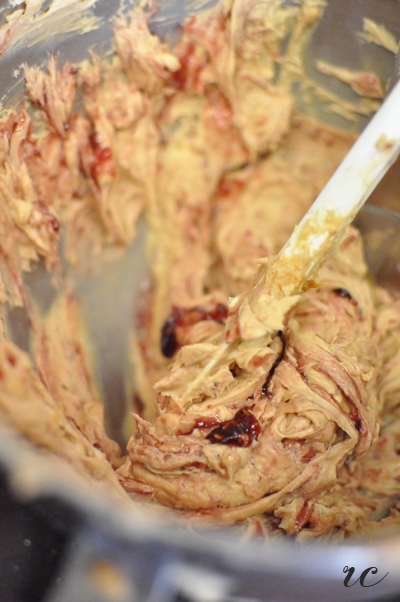
Almost a whole year ago I made peanut macaron shells for the first time. If you remember from this post, I had a lot of trouble filling them. Finally, about 11 months later, I decided to give the filling another shot. Instead of just straight peanut butter and jelly (which I thought was a little too heavy for these delicate things), I decided to try to make a peanut butter buttercream (try to say that five times fast!) and then swirl in raspberry jam.

Peanut Butter Jelly Buttercream

It worked beautifully! It looked like I added enough jam (there’s a lot of red in the picture) but once I piped them onto the shells it seemed to have mixed more and the color wasn’t as distinct. But here they are anyway:

Peanut Butter and Jelly Macarons

Use any buttercream recipe, omit the vanilla (no need for that fancy, expensive stuff) and add a generous amount of peanut butter (smooth or chunky are both fine. I used/prefer chunky!). Using the paddle on a stand-mixer, mix the butter and peanut butter first, then mix in powdered sugar and whip until satisfied with consistency. Most recipes are going to use unsalted butter but I think either unsalted or salted is fine. Some recipes will call for a splash of milk or cream, but I did without it. Remove from stand-mixer and spoon in a few scoops of favorite jelly (I used raspberry). Fold into the buttercream mixture until pretty. Avoid overmixing if you like the marble-effect. I personally think the peanut butter part of a PB&J sandwich outweighs the jam in terms of awesomeness so I was more on the conservative side with the jelly.

Assemble by piping the buttercream onto one shell, then carefully sandwich with the other shell. Don’t press too hard otherwise the shells will crack. Then take a million pictures and, finally, consume asap.

King Trumpet & Onions

I have to credit most of this post to my friend Brian, who really was the one who stumbled across this recipe of his. Couple months ago we decided to have a steak dinner night, and Brian had made sauteed mushrooms for our side. They were so good that they were completely devoured before the steaks were even done. When we went to his fridge to make more, we were very sad to find that we used the last of his button mushrooms but there was a bag of King Trumpet mushrooms! HMM… hunger outweighed our fear that it wouldn’t be so good so into the pan they went.

And now it’s because my go-to dish to cook. Just thinking about them makes me hungry :( So I will write this post quickly so I can feed my incessantly hungry-for-mushrooms tummy.

It’s super easy and super delicious. I love it when the ratio of easy to yummy is so high! All you need is a bag of King Trumpet (also known as King Oyster) mushrooms, a yellow onion, soy sauce, a splash of red wine and sesame oil.

First oil up the pan and saute the onions until they are clear and smell yummilicious. Then throw in the sliced mushrooms and saute until soft. I had to add a little more oil since mushrooms love to absorb that stuff. Then add the soy sauce! Depending on the soy sauce, some sugar may be required so it doesn’t become overly salty. Add a splash of red wine and cover the pan. How much soy sauce to use  is really up to you, depending if you like saucy dishes or not. I prefer to make extra sauce so I can lay this stuff right on my white rice. So yumssss.

When both the onions and mushrooms are soft and infused with the soy-wine sauce, drizzle a generous amount of sesame oil, give the pan a stir and plate. You’re done!

I cooked this 5 minutes before my sister had to leave for the airport. Off to San Diego it went!


I think the secret behind this dish is the use of sesame oil. It brings out such a great earthy flavor. Many thanks to Brian for making this dish so I can eat it 24/7 and blog about it here. Now I’m REALLY hungry and thus must find some food to eat…

Herb Ciabatta

After weeks of trying every Ciabatta recipe I could get my hands on, I think I’ve found something that works! Ciabatta is one of favorite breads — after sourdough — but it’s been really difficult to bake because of its unique traits: crunchy crust, light and holey on the inside. It’s also an incredibly wet dough that has to proof at least overnight so working with it requires some patience, something I’m not quite familiar with.

after 18 hours out at room temperature, the dough about doubles in size

Tip #1: When working with this dough, be gentle and only touch it when necessary. Be efficient. Unnecessary movement in the dough will cause the gas bubbles  to collapse and you’ll lose the big holes Ciabatta is known for in the final product.

Look at those gluten stands! If you see this, you're doing something right :)

I can’t share the recipe I am using, but I will leave you some tips and a video that I found to be very helpful. A lot of recipes out there require you to make a sponge beforehand, which makes baking Ciabatta a two-part, two-day process with two mixes. I didn’t find that this extra time or energy was worth it.

Shaped, proofed and ready to bake

Tip #2: Proofing bread is much, much easier during the summer time or when your kitchen is warm. My kitchen is, sadly, always freezing! Good thing I have a proof box. Google make-shift proof boxes.

Tip #3: Get a cooling rack. They say the cooling process is the actual last step and not to be skipped! So even though it’s hard to resist, hands off until the bread is cooled.

I initially started baking just plain, white Ciabatta, which is great for sandwich bread – especially if you have a panini grill! But I also wanted a bread that stood on it’s own so I needed a little more flavor. If you’re interested in herbs, find any dried spices that you like or already have in your kitchen. Rosemary, basil, or oregano all work. Just mix in with the rest of the ingredients until incorporated.

Tip #4: Always have butter on-hand. Spread generously on bread and enjoy!

Good luck! Let me know how it goes :)

Tagged ,

I Love Mushrooms

I was planning a picnic with a girlfriend and decided this would be the perfect opportunity to make Garlic Butter Roasted Mushrooms, a recipe I saw on Smitten Kitchen.

I love mushrooms. Anyone who knows me even just a little bit about me will know this. Crimini mushrooms, Portabello mushrooms, Shiitake mushrooms and most of all, truffles! I preface this post with this because how delicious I think this dish is may be very skewed by my mushroom-bias. I mean I’d pretty much eat mushrooms cooked plain. So… yea, take my words with a grain of salt… then take that salt and season your mushrooms with it :)

This recipe is really easy, from start to finish in about 20 minutes. I didn’t follow the recipe’s measurements though because I’m trying not to take the measuring utensils out anymore. My mom never uses them, her mom doesn’t, and so forth. Soon I will be married, in my own kitchen, and I must learn to cook by taste, by experience. No more measurements!

So I was actually really nervous about how these would turn out. I knew I had put in waaayy too many capers the moment I took them out of the jar, but oh well. Waste not, want not, right?  The recipe calls for 2 Tb but if I had to guess, I think I doubled that. I’m also really bad at estimating. The worst.

What you’ll need:
2 packages of crimini mushrooms ($1.69 each at Trader Joe’s!)
minced garlic, lots of it
capers, juice drained
salt and pepper for seasoning
butter, sliced
juice from half a lemon
chopped parsley

Here is what I did but feel free to follow Smitten Kitchen for exact measurements. First, I wiped mushrooms down with a damp paper towel and threw them in my 9″ x 12″ Pyrex. I chopped the capers up a bit (make sure not to use the juice) and threw them over the mushrooms. Threw in a couple spoonfuls of minced garlic. Twisted a couple rounds on my sea-salt grinder as well as my pepper-grinder. More pepper the yummier :) Slice up a couple Tb of butter (btw, I LOVE how there are markers dividing the stick for you) and place them around the dish. Stick in the oven at 450 degrees for about 15 minutes. Stir the mixture about 5 minutes in and again around 10 minutes in.

I like my mushrooms really soft and fully cooked so I think I let mine bake for 18 minutes. After you take them out of the oven, this would be the optimal time for the lemon juice and chopped parsley but I was simply way too excited about this dish to even remember those ingredients. It wasn’t until I was halfway through them that I realized I had totally forgot about them.

They were great right out of the oven but I saved half  and stuck them in the fridge. At the picnic I served them cold and they were still de-lish!

I think next time I’ll need to add a little wine though. And maybe some yellow onions. And more mushrooms – two packs wasn’t enough for me :)

Tagged , ,

Failed Pralines

The other day I was suddenly in the mood to make something in the kitchen, as I often am. I flipped open one of the pastry magazines that are sent to me and came across a simple enough praline recipe – or so I thought.

Initially I thought it would be silly of me to post about something that I wasn’t successful in making but then I realized I’m not a huge fans of pralines anyway and thus probably will not be trying this recipe again. So I will leave you with the recipe in case you are interested and some notes that, evidently, both did and did not work out for me.

Recipe from the Culinary Institute of America:
350 g sugar
350 g brown sugar
180 g heavy cream
100 g milk
90 g butter
350 g pecans
1 t salt
1 t vanilla extract

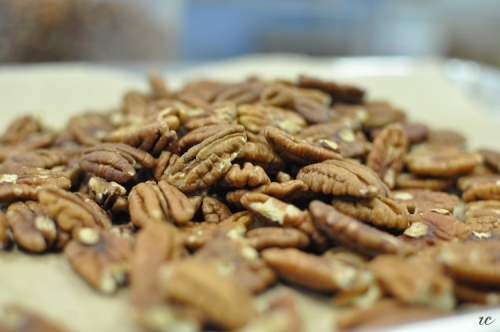
toasting pecans

First, you’re going to want to toast your pecans. I popped mine in the oven at 350 for about 10-15 minutes, until they’re nice and crunchy. Then, combine the sugars, milks and butter together on the stove and cook until . I didn’t have a candy thermometer (which may or may not be the exact reason this recipe was a fail for me) so I estimated about 5 minutes after boiling.

You’re also going to want a big pot. The magazine suggested a 4qt. but I ended up burning myself when the pot came to a boil. I had always heard candy burns are the worst and can now speak from experience and say: lkjlkSJFLKSfd. But the hardest part comes next when you mix the nuts into the caramel mixture and “vigorously” stir for 45 seconds or until creamy. Vigorously meaning stir quickly and powerfully while simultaneously being careful enough to not get any of the 215 degree mixture on your clothes or worst, yourself. (Praline-1, Regina-0).

Mine took much more than 45 seconds and that’s when I knew this recipe wasn’t going to work out for me. Even after 2 minutes of stirring the mixture was still too liquidy and not at all sticky like caramel or pralines should be. I had scooped about half the mixture when I decided to give it another “vigorous” stir to see if I could stiffen it up a bit but this made the mixture even worse.

first half of the mixture vs the second half which I mixed again

I ended up having the pop them in the fridge overnight to dry. In the morning I took a bite and tossed them all in the trash :( Pralines-2, Regina-0.

Here’s a couple things I would’ve changed if I were to try this recipe again: instead of using whole milk (the recipe cleverly did not specify!), I would try some 1/2 & 1/2. I’d probably cut the milk a little bit too and definitely cut the white sugar. The end product literally tasted like spoonfuls of sugar with pecan bits in them.

In other news, my mom created a new product today! Aren’t they cute??

Chocolate and Espresso Mousse Verrine

I was online trying to find a new name for them when I came across Tartelette‘s verrines. Verrines. Verrines… I think this is my new favorite word. Verrines. Just rolls off your tongue, doesn’t it?

And how did I not know about verrines before? I’m giddy just thinking about them. My mind is already spinning with all the possible combinations I could try. Right now I’m drooling over Tartelette’s Milk Chocolate and Chestnut Mousse Verrines. No doubt they are what I’m going to try next.

Until then!

Tagged , ,

Banana Cream Tart

A few months ago, a couple friends and I spent the day in SF just for… well, eats. We woke up at 9am (way too early for a Saturday morning), got in the car and drove an hour to the SF Flea Market for this glorious sandwich:

Porchetta Sandwich from Roti Roli

But in good foodies-fashion, after something savory we needed something sweet. The savory truffle macaron (yea, truffle macaron – you read that right) that we tried at the Ferry Building just couldn’t quite be classified as dessert in our books. After much searching and googling, we ended up at Tartine Bakery.

We ordered a few items, none of which were very memorable except for their Banana Cream Tart. What I remembered most about is was that it cost $6.50 for a tart of 4″ in diameter :( But I must admit that was rather beautiful, pretty good and sparked my own Banana Cream Tart creation.

I needed to make a few changes though to fit my liking. My main problem with the Tartine treat was that the shell was incredibly hard. I’m not sure if this was on purpose or if the tart shells were old, but to say that I was afraid for the utensils wouldn’t be a gross exaggeration. They used a napolean-like pastry dough for the shell instead traditionally using something like shortbread. It had a nice texture since pastry dough is very flakey, but I didn’t think the use of it in a tart was necessary. In addition, I found their banana custard too liquidy when I tend to like my custard nice and thick… and, well, fatty :)

The last change I made in my version was leaving their dollop of caramel syrup out. My heavier custard and sweeter whipped cream made this ingredient excessive. I did like how Tartine lined the insides of their tarts with dark chocolate though – a trick bakeries use to increase the shell’s shelf life – so I followed through with that step. It does give the pastry a nice, unexpectant touch.

one thin layer of chocolate, banana custard, whipped cream, chocolate shavings and powdered sugar

So I was out $6.50 but stumbling across this creation was well worth the money, the trip and even the few extra pounds I’ve put on since :)

Tagged , , ,

S’more Macarons

Hello again! Excuse my hiatus. I was honestly too exhausted after my baguette challenge to continue any kind of baking, including making macarons. Baking bread is incredibly difficult. It looks easy, sounds easy and has an easy recipe, but man is it exhausting. But that’s a different story for a different time.

This post is about my friend Stephanie. My friend Stephanie loves macarons. She also loves s’mores. She now loves s’more macarons (I hope?)!

I’m surprised there aren’t too many recipes/sites on this delicious little treat yet. I thought the concept was fairly simple. I’d make the shells graham-cracker-flavored and fill with marshmallows and melted chocolate. To put a more personal touch, I decided to make the marshmellows from scratch instead of using store-bought ones.  And luckily for me, I have easy access to a lot, lot of chocolate icing – which is better than boring melted chocolate :)

For the shells, I added about 25-30 g of crushed graham crackers  to the mixture – the finer the grind, the better. I made a little extra to sprinkle on the tops of the shells, scared that the shells wouldn’t have enough color.

The marshmallows take overnight to set so I had to make them a day before. I’ve used a couple recipes, and the final product doesn’t come out too differently. If you plan to make these though, have patience and know that it’s going to be very, very sticky! Once they set overnight in the fridge, and you tumble the pieces through powder sugar, they are more manageable.

I used a circular cookie cutter to cut the marshmallow the size of my piped shells. Meanwhile, I put a bowl of chocolate frosting over some warm water to thin in a bit and make it easier to use.

Then, assembly!

But like I said, this is a post about my friend Stephanie. She loves macarons, and she loves s’mores. I know they were like a million days late, but I hope she liked them anyway!

Everyone strives for perfection, but there's something very beautiful about imperfection.

Tagged , ,