Category Archives: Recipes

Cake Bites: what they are and how to make them

Friends of mine are probably already tired of me yapping away about my newly created Cake Bites. It’s only been one week since I officially started making them, but I’ll be honest and say I’ve been over-the-top promoting them. I just can’t help it! It’s the first product that I’ve created that is really taking off. And why wouldn’t they? Bite-size cakes, who doesn’t want that?

I was actually really surprised to find that no one else is making these yet. Instead, stores and websites are currently obsessed with cake pops. As cute as they are, I find that the popsicle stick useless and a waste of resources. If you’re going to have a bite-size dessert, shouldn’t it really just be bite-sized? As in, pop it in your mouth and that’s it?

I compare my Cake Bites to donut holes. I’m not a fan of donuts but I do love donut holes. Doesn’t make too much sense, right? I think it’s the ease of eating them, how you can (in most cases) control how many (really I mean little) you are eating, and how much more glaze you get compared to a donut bite :)

I really wanted to make them look like truffles too, like the chocolate. As you may or may not know, I used to be pretty obsessed with Godiva chocolates. I also fell in love with making chocolate candies after attending a 2-day chocolate making class in Torrance. I joined these two ideas together – donuts and truffles – to create Cake Bites.

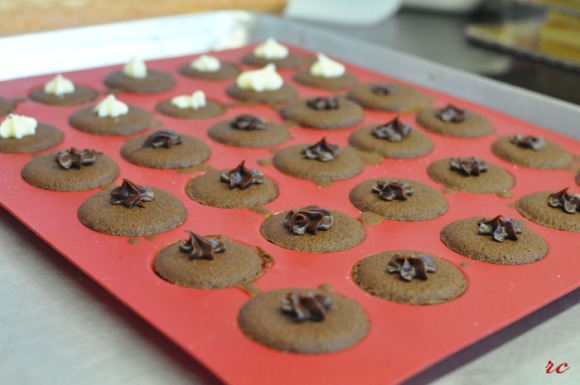
I originally wanted to make them perfectly sphered, but I had bought these macaron molds from Amazon that ended up being way too small for macarons. I baked cake in the macaron molds, and it turned out great. Not completely circular, but good enough.

So fill the molds with the batter of your choosing and bake. Be careful not to overbake since they are so small. Once I overbaked mine and even though they were super easy to pop out of the molds that way, it did not taste good. Underbaking will also make it extremely difficult to pop the bites out. Some playing around with the oven might be necessary to find the exact minutes these babies need to be in there.

Let them cool down before touching them. If baked correctly, most of them should pop out if you give it a little shake upside down. Otherwise they should be easily peeled out. If they’re cracking while doing that, it’s probably just a bit underbaked. If that’s the case just invert the silicone mold (yay for silicone molds!) and de-pan that way. It’s still super easy, just a bit more time consuming.

Then, on half the shells, pipe just the amount of icing needed to adhere the two sides together. Find it’s other half (one of my favorite steps of macaron making!) and sandwich together.

Throw them in the freezer for a little bit so they are easier to handle. Meanwhile prepare the shavings and icings. Shaving chocolate is very, very easy. Literally take a vegetable peeler and start peeling away at a block of chocolate. If you can warm up the block (maybe in a warm oven for a few minutes), you’ll get much nicer shavings and ribbons.

You want to get your icing as soft as you can. In my case I just popped it in the microwave for about 20 seconds. After the now sandwiches are just a bit hard, cover them in icing. Use the method that is easiest for you. Throw them in then fish them out, or cover them with your hands, or drizzle the icing over them (though this method produces a lot of waste).

It’s important to completely cover the sides of the sandwich so the end product can resemble a sphere. If the sides aren’t completely covered you’ll be able to see the two layers, in which cake your Cake Bites will look a lot more like Whoppie Pies. Toss the covered sandwiches in your chocolate shavings and cover completely… and you’re done! After working with them the Cake Bites will be very soft and ready to eat. I store them in the fridge until serving because the chocolate will melt in the heat.

Make variations by using different icings and shavings

I bought little baggies from Joann’s and that’s how I’ve been serving them. Cute, no? :)

Easy, cute and delicious. Good luck!

Tagged , , , , ,

PB&J Macarons v2

I’m trying to move my blog so excuse my lack of posts! Will let you know when the website is finally up and running. Probably won’t be for a few weeks though because I’ve been consumed with making new goodies! This past Wednesday I made three kinds of macarons, baked Ciabatta bread and made Chocolate and Chestnut Mousse Verrines all in one day. It was exhausting but also ridiculously fun.

Almost a whole year ago I made peanut macaron shells for the first time. If you remember from this post, I had a lot of trouble filling them. Finally, about 11 months later, I decided to give the filling another shot. Instead of just straight peanut butter and jelly (which I thought was a little too heavy for these delicate things), I decided to try to make a peanut butter buttercream (try to say that five times fast!) and then swirl in raspberry jam.

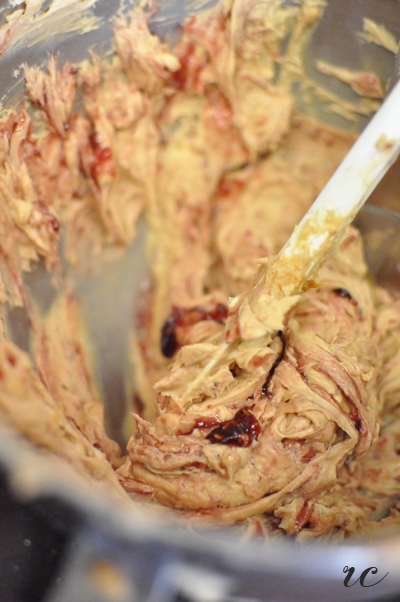
Peanut Butter Jelly Buttercream

It worked beautifully! It looked like I added enough jam (there’s a lot of red in the picture) but once I piped them onto the shells it seemed to have mixed more and the color wasn’t as distinct. But here they are anyway:

Peanut Butter and Jelly Macarons

Use any buttercream recipe, omit the vanilla (no need for that fancy, expensive stuff) and add a generous amount of peanut butter (smooth or chunky are both fine. I used/prefer chunky!). Using the paddle on a stand-mixer, mix the butter and peanut butter first, then mix in powdered sugar and whip until satisfied with consistency. Most recipes are going to use unsalted butter but I think either unsalted or salted is fine. Some recipes will call for a splash of milk or cream, but I did without it. Remove from stand-mixer and spoon in a few scoops of favorite jelly (I used raspberry). Fold into the buttercream mixture until pretty. Avoid overmixing if you like the marble-effect. I personally think the peanut butter part of a PB&J sandwich outweighs the jam in terms of awesomeness so I was more on the conservative side with the jelly.

Assemble by piping the buttercream onto one shell, then carefully sandwich with the other shell. Don’t press too hard otherwise the shells will crack. Then take a million pictures and, finally, consume asap.

King Trumpet & Onions

I have to credit most of this post to my friend Brian, who really was the one who stumbled across this recipe of his. Couple months ago we decided to have a steak dinner night, and Brian had made sauteed mushrooms for our side. They were so good that they were completely devoured before the steaks were even done. When we went to his fridge to make more, we were very sad to find that we used the last of his button mushrooms but there was a bag of King Trumpet mushrooms! HMM… hunger outweighed our fear that it wouldn’t be so good so into the pan they went.

And now it’s because my go-to dish to cook. Just thinking about them makes me hungry :( So I will write this post quickly so I can feed my incessantly hungry-for-mushrooms tummy.

It’s super easy and super delicious. I love it when the ratio of easy to yummy is so high! All you need is a bag of King Trumpet (also known as King Oyster) mushrooms, a yellow onion, soy sauce, a splash of red wine and sesame oil.

First oil up the pan and saute the onions until they are clear and smell yummilicious. Then throw in the sliced mushrooms and saute until soft. I had to add a little more oil since mushrooms love to absorb that stuff. Then add the soy sauce! Depending on the soy sauce, some sugar may be required so it doesn’t become overly salty. Add a splash of red wine and cover the pan. How much soy sauce to use  is really up to you, depending if you like saucy dishes or not. I prefer to make extra sauce so I can lay this stuff right on my white rice. So yumssss.

When both the onions and mushrooms are soft and infused with the soy-wine sauce, drizzle a generous amount of sesame oil, give the pan a stir and plate. You’re done!

I cooked this 5 minutes before my sister had to leave for the airport. Off to San Diego it went!


I think the secret behind this dish is the use of sesame oil. It brings out such a great earthy flavor. Many thanks to Brian for making this dish so I can eat it 24/7 and blog about it here. Now I’m REALLY hungry and thus must find some food to eat…

I Love Mushrooms

I was planning a picnic with a girlfriend and decided this would be the perfect opportunity to make Garlic Butter Roasted Mushrooms, a recipe I saw on Smitten Kitchen.

I love mushrooms. Anyone who knows me even just a little bit about me will know this. Crimini mushrooms, Portabello mushrooms, Shiitake mushrooms and most of all, truffles! I preface this post with this because how delicious I think this dish is may be very skewed by my mushroom-bias. I mean I’d pretty much eat mushrooms cooked plain. So… yea, take my words with a grain of salt… then take that salt and season your mushrooms with it :)

This recipe is really easy, from start to finish in about 20 minutes. I didn’t follow the recipe’s measurements though because I’m trying not to take the measuring utensils out anymore. My mom never uses them, her mom doesn’t, and so forth. Soon I will be married, in my own kitchen, and I must learn to cook by taste, by experience. No more measurements!

So I was actually really nervous about how these would turn out. I knew I had put in waaayy too many capers the moment I took them out of the jar, but oh well. Waste not, want not, right?  The recipe calls for 2 Tb but if I had to guess, I think I doubled that. I’m also really bad at estimating. The worst.

What you’ll need:
2 packages of crimini mushrooms ($1.69 each at Trader Joe’s!)
minced garlic, lots of it
capers, juice drained
salt and pepper for seasoning
butter, sliced
juice from half a lemon
chopped parsley

Here is what I did but feel free to follow Smitten Kitchen for exact measurements. First, I wiped mushrooms down with a damp paper towel and threw them in my 9″ x 12″ Pyrex. I chopped the capers up a bit (make sure not to use the juice) and threw them over the mushrooms. Threw in a couple spoonfuls of minced garlic. Twisted a couple rounds on my sea-salt grinder as well as my pepper-grinder. More pepper the yummier :) Slice up a couple Tb of butter (btw, I LOVE how there are markers dividing the stick for you) and place them around the dish. Stick in the oven at 450 degrees for about 15 minutes. Stir the mixture about 5 minutes in and again around 10 minutes in.

I like my mushrooms really soft and fully cooked so I think I let mine bake for 18 minutes. After you take them out of the oven, this would be the optimal time for the lemon juice and chopped parsley but I was simply way too excited about this dish to even remember those ingredients. It wasn’t until I was halfway through them that I realized I had totally forgot about them.

They were great right out of the oven but I saved half  and stuck them in the fridge. At the picnic I served them cold and they were still de-lish!

I think next time I’ll need to add a little wine though. And maybe some yellow onions. And more mushrooms – two packs wasn’t enough for me :)

Tagged , ,

Failed Pralines

The other day I was suddenly in the mood to make something in the kitchen, as I often am. I flipped open one of the pastry magazines that are sent to me and came across a simple enough praline recipe – or so I thought.

Initially I thought it would be silly of me to post about something that I wasn’t successful in making but then I realized I’m not a huge fans of pralines anyway and thus probably will not be trying this recipe again. So I will leave you with the recipe in case you are interested and some notes that, evidently, both did and did not work out for me.

Recipe from the Culinary Institute of America:
350 g sugar
350 g brown sugar
180 g heavy cream
100 g milk
90 g butter
350 g pecans
1 t salt
1 t vanilla extract

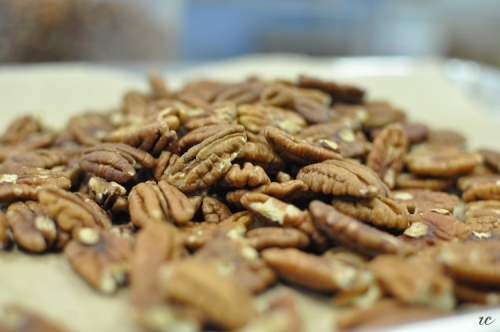
toasting pecans

First, you’re going to want to toast your pecans. I popped mine in the oven at 350 for about 10-15 minutes, until they’re nice and crunchy. Then, combine the sugars, milks and butter together on the stove and cook until . I didn’t have a candy thermometer (which may or may not be the exact reason this recipe was a fail for me) so I estimated about 5 minutes after boiling.

You’re also going to want a big pot. The magazine suggested a 4qt. but I ended up burning myself when the pot came to a boil. I had always heard candy burns are the worst and can now speak from experience and say: lkjlkSJFLKSfd. But the hardest part comes next when you mix the nuts into the caramel mixture and “vigorously” stir for 45 seconds or until creamy. Vigorously meaning stir quickly and powerfully while simultaneously being careful enough to not get any of the 215 degree mixture on your clothes or worst, yourself. (Praline-1, Regina-0).

Mine took much more than 45 seconds and that’s when I knew this recipe wasn’t going to work out for me. Even after 2 minutes of stirring the mixture was still too liquidy and not at all sticky like caramel or pralines should be. I had scooped about half the mixture when I decided to give it another “vigorous” stir to see if I could stiffen it up a bit but this made the mixture even worse.

first half of the mixture vs the second half which I mixed again

I ended up having the pop them in the fridge overnight to dry. In the morning I took a bite and tossed them all in the trash :( Pralines-2, Regina-0.

Here’s a couple things I would’ve changed if I were to try this recipe again: instead of using whole milk (the recipe cleverly did not specify!), I would try some 1/2 & 1/2. I’d probably cut the milk a little bit too and definitely cut the white sugar. The end product literally tasted like spoonfuls of sugar with pecan bits in them.

In other news, my mom created a new product today! Aren’t they cute??

Chocolate and Espresso Mousse Verrine

I was online trying to find a new name for them when I came across Tartelette‘s verrines. Verrines. Verrines… I think this is my new favorite word. Verrines. Just rolls off your tongue, doesn’t it?

And how did I not know about verrines before? I’m giddy just thinking about them. My mind is already spinning with all the possible combinations I could try. Right now I’m drooling over Tartelette’s Milk Chocolate and Chestnut Mousse Verrines. No doubt they are what I’m going to try next.

Until then!

Tagged , ,

Lemon Meringue Tartlets

“Tartlets… tartlets… tartlets… word has lost all meaning.” :D

I’ve never had meringue up until I made these little things… which isn’t really a good thing considering I’m not certain how meringue is SUPPOSED to taste; but according to my mother – who has failed multiple times making it, can you believe it! – she says it’s pretty good.

First things first! Bake your tart shells. Really you could make these in any size, but I wanted mine bite-size so I opted for the smallest tart shells I could find. If you don’t have any, Bed Bath & Beyond sells them for pretty cheap.

Depending on the shells, bake them until crisp. Be careful not to overbake them though because you’ll have to stick them back in the oven later.

Once the shells are cooled, fill with your favorite lemon custard/curd recipe. Flatten the top with a spatula.

The first time I made these, the meringue was way too sweet. I also found that it was hard to make the meringue stiff too when it contained that much sugar. So here’s the recipe that I use now:

Meringue for Lemon Tartlets:
3 egg whites (room temperature is best)
3oz granulated sugar
pinch of salt

In a stand mixer, whisk egg whites on medium speed until foamy. Gradually add sugar and salt until meringue becomes glossy. Turn to medium-high until meringue forms peaks and starts to slightly pull away from your whisk and bowl, about 5-7 minutes.

Using a decorators tip, pipe meringue onto the lemon tartlets. I was quite generous and too ambitious with mine because I wanted a really tall tart — but the meringue doesn’t like to defy gravity; it tilts and starts to weep :(

Then I like to bake the tarts. It seems like people only bake their lemon meringue tarts when a torch isn’t available, but I like to do both. Letting them sit in the oven for a little bit creates a slightly crunchier outer layer of the meringue, which I really like. When you only torch them, it looks nice, but the meringue is still soft inside. So I throw the tartlets back into the oven at 300 degrees for about 8 minutes, then TORCH! If you don’t have one, they are supppper fun and handy too. Bed Bath & Beyond to the rescue again.

Let the tarts cool a little bit because the contents will be HOT, but then consume immediately afterwards :)

Tagged

Dark Almond Ganache, Black Sesame Buttercream

My pairings turned out pretty well yesterday so I wanted to share with you :) For my chocolate macarons, I filled them with Dark Almond Ganache. Here’s the recipe I used:

Dark Almond Ganache, adapted from Use Real Butter:

6.5oz dark chocolate
1.5oz milk chocolate
3/4 C manufacturing cream
2 T unsalted butter
1.5t almond extract

First heat the cream to a boil, then pour over chocolate. Leave it alone until the chocolate becomes soft, then whisk in butter until smooth. Stir almond extract in until incorporated.

I wanted more of a almond flavor so I up-ed the almond extract from 1t in the original recipe to 1.5t in mine. The almond flavor was then quite strong, which I personally liked, but also slightly bitter. Next time I’ll decrease it to 1.25t and probably use more milk chocolate.

Now for the Black Sesame shells… I still had left over buttercream so I decided why not? I added 1.5T of black sesame powder to my buttercream and viola, it was amazing! The black sesame powder does WONDERS (I bought mine at Marina, $2.99 a bag!). I especially like that it already comes slightly salty, so it didn’t make the buttercream overwelming at all. YUMMSSS

I also love my new Nikon. The photos turned out beautifully.  YAyyyys :)

Tagged ,